Many of you have grown potatoes on your site. Usually the harvest is quite high. But few people know that it can be increased approximately twice. This is exactly what the Dutch potato growing technology does. For several years, gardeners have successfully used the Dutch potato planting method, which is distinguished by high yield. Previously, this method was considered acceptable only for large farms, but it also became relevant in suburban areas. This article describes in detail how to grow potatoes using Dutch technology and get a good harvest.
What is this way?
Thus, the development of tubers occurs in more favorable conditions. Located on the ridges, they have direct access to the sun's rays.
The following basic principles of Dutch technology:
- The use of exclusively high-quality material for planting, purchased in specialized stores and nurseries.
- Using the principle of crop rotation - the landing site must be changed every 3 years. Ideal potato precursors are cereals and legumes.
 Timely application of appropriate fertilizers.
- Pest control of vegetable crops, as well as with sources of viral and bacterial contamination.
- Special soil treatment in spring and autumn.
 Timely application of appropriate fertilizers.
The technique does not tolerate amateur performance - all procedures should be consistent and timely. The technology is highly productive - the harvest from one bush reaches 1.5-2.5 kg. Thus, on a standard household plot, the farmer will receive about 300 kilograms of selected potatoes from the weave.
Pros and cons of the method
Positive effects of using Dutch technology:
- Quick harvest thanks to the use of mid-early potato varieties.
- The most intensive formation of tubers on each bush.
- The correct form and more attractive type of vegetable.
- Constant taste characteristics during storage.
The disadvantages include:
- Cultivation of potatoes according to the Dutch method requires a lot of effort from the farmer during the whole vegetative period, special attention should be paid to the preparatory work.
- The complexity of the observance of crop circulation crops in small suburban areas.
- A thicker fit due to space saving reduces the efficiency of the method.
- A gardener can make a mistake by purchasing planting material - some experience is needed to purchase an elite variety.
- The summer resident does not have the opportunity to strictly adhere to the terms of all the necessary manipulations.
Necessary conditions methods in the country
To achieve a positive result, strict procedures should be followed.
Variety selection
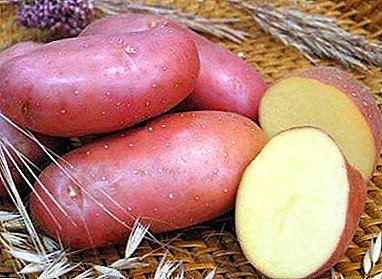
Dutch varieties are best suited for this method.. They are deservedly considered to be resistant to many diseases, as well as to unstable weather conditions. A gardener should pay attention to the following types:
- Santa;
- Red Scarlett;
- Prior;
- Mona Lisa;
- Romano;
- Condor.
Russian agronomists from the northern regions are encouraged to give preference to domestic varieties due to climatic conditions.
Regardless of the selected grade, planting material must be properly prepared.
 For powerful shoots, potatoes must be varietal and not too large. Ideal parameters of potatoes - 5 cm in diameter with weight up to 50 g. The eyes should not be less than 5. Potatoes are germinated on a thin layer of paper or tissue within a month at a temperature not higher than +18 ° C.
It is advisable to start planting when the shoots reach 5 mm. This is the most suitable size for planting material. This rule should be strictly followed only with a mechanized landing to prevent damage to the shoots. In the conditions of the summer cottage, the length of shoots is up to 2.5 cm
Land, tools and fertilizers
Preparation of the soil should attend to the fall. A landing site should be perfectly level on a small elevation, as well as well lit and blown. These conditions are extremely important in order to avoid disastrous stagnation of moisture.
Having marked the beds, it is worth digging up the soil to a depth of 22-27 cm, as well as fertilizer. For these purposes, suitably rotted manure or compost. As for inorganic compounds, add 20 g of potassium sulfate and 50 g of superphosphate per square meter of land.
Additional benefit will be sowing the site with plants that will later be embedded in the soil, enriching it with nitrogen — alfalfa, mustard or rape. All manipulations are conveniently carried out with a reversible plow or a cultivator with a disc.
At the very beginning of spring, the bed is re-plowed, this time enriching the soil with carbamide or ammonium sulfate (40-50 g per m2). Urea can also be added. Processing during this period is carried out by a frezoy-cultivator, which crushes, loosens and levels the soil.
Ordinary forks with a depth limiter can be used (the thickness of the teeth should be 6 mm, and the distance between them should be 30 mm).
It is important to minimize the time interval between soil preparation and planting of tubers so that the earth does not lose moisture and oxygen. At the same time, it is necessary to wait for the soil to warm up to + 10 ° С.
Planting material is placed sprouts up to a depth of 6-8 cm with ashes, eggshell and onion peel. The distance between the future bushes should be about 30 cm, and between the rows themselves - 70-75 cm. Then a high ridge is formed with a cross-sectional area of 1500 cm2. Such conditions provide maximum nourishment for the bush, the roots are aerated, and excess water flows freely between the shafts.
Planting care
 When the first stems appear, you should carefully remove all the weeds and pile up the seedlings so that the shaft reaches a height of 12 cm. The optimal embankment width should be 35 cm. After about a month, the weeding procedure should be repeated and the ridges should be increased to 30 cm. You can use a hoe or shovel.
In the future, herbicides are used to control weeds. Also for these purposes, it is permissible to fill the space between the rows with peat crumb or freshly cut grass.
Watering is best done using drip irrigation.. If this is not possible, for the entire vegetative period it is carried out 3 times - before the appearance of the buds, 7-10 days after the start of active flowering, and then 10 days after its completion.
Processing from the Colorado potato beetle is performed strictly before the flowering of the bushes, and then repeated 3-4 more times. In order to avoid habituation, it is recommended to use a new tool each time - “Zukoed”, “Bankol”, “Corado”.
Prevention of late blight should be carried out 5-6 times per season with drugs such as "Skor", "Topaz", "HOM".
Before harvesting the potatoes, the shoots are harvested and burned.. Tubers are left in the ground for another 1.5 weeks to make their skin more dense. This will allow the vegetable to be stored longer.
How to use this method at home?
It is equally interesting to try to apply the Dutch technology directly on the balcony. To do this:
- Prepare boxes, bags or buckets where potatoes will grow and place them on a warm loggia. The depth of the vessels should be at least 25 cm.
- Choose soil - air, but not too loose. Lay out a 2-3 cm layer of drainage on the bottom of the pot.
- Suitable substrate - turf or rotted compost.
- Sprout the tubers before planting and place them in a container with sprouts up in three layers (first row - 6 cm from the bottom, then two more with the same intervals). This will significantly save space.
- The temperature regime should be stable without sudden drops (25-32 ° C), and the air humidity should not exceed 65-75%. Such parameters will contribute to the maximum division of tubers.
- Watering requires a rather scant once every 12–15 days, which will protect the roots from rot and fungal infections.
- Plant nutrition - complex liquid mineral fertilizers once every 7 days throughout the vegetative period.
With strict adherence to the methodology, it will be possible to collect 1.5 kg of small tubers from one bush. and eat homemade potatoes in an urban setting.
- under the straw;
- in a barrel;
- in boxes and boxes without bottom;
- in bags.
Thus, Dutch agricultural technology is a reliable way to increase the efficiency of potato planting. Elite seed material and the effort spent on compliance with all regulations, will pay off the number of seedlings and quality of tubers.