There are many incubators that differ in the presence or absence of any functions, making it easier for the poultry farmer to determine the choice of the desired device. Today we will look at the types of incubators, the list of popular devices and their description, what to look for when buying and how to make an incubator with your own hands.
Incubator Types
Heating chambers are presented in the form of incubation, output or combined devices, which have their own characteristics, differences and functionality.
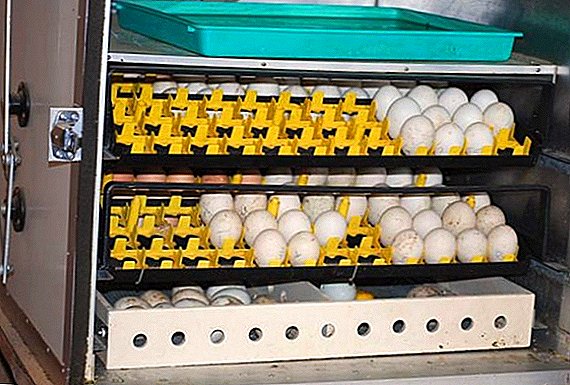
Incubation
This type of chambers is designed to incubate eggs until the shell nestles nestling. The process of incubation covers the main part of the embryonic period.
Important! It is worth remembering that the hatching of eggs in incubation devices is impossible, therefore, it is also necessary to stock up on a hatchery incubator.This chamber differs from the hatcher in the presence of a mechanism for turning the trays so that the eggs evenly warmed up during the incubation process. In such chambers, a uniform heating mode is observed, the temperature variation inside is minimal, which allows for a high-quality incubation process.

Lead
Breeding chambers are necessary in order to carry out the final stage of incubation - hatching. The equipment with which such cameras are equipped allows horizontal placement of trays in order to simplify the process of hatching to chicks.
Learn how to plant a goose to hatch eggs, as well as how long the goose hatching eggs.
These devices have a convenient cleaning and washing system inside the chamber, which allows you to remove all debris at the end of the process. These cameras do not have a system for turning the trays, but at the same time they are equipped with a powerful air exchange and cooling system, which are necessary directly in the process of hatching chicks. 
Combined
Domestic incubators are most often combined: it is very convenient, it saves space and money, since there is no need to purchase incubation and excretory chambers separately. Combined devices are quite expensive, but they combine in themselves two processes - incubation of eggs and hatching chicks.
Important! Despite the convenience of combined chambers, in large hatcheries they prefer to use incubation and hatcher cabinets separately.In such chambers there is a system of turning and heating the eggs, but the trays can be fixed in time in a horizontal position and the coup can be turned off in order for the hatching process to start. Combined devices are also equipped with a high-quality system of air exchange and cooling, they are easy to clean after hatching.

How to choose the right incubator
In order to purchase a quality device for heating and hatching eggs, you need to pay attention to the following parameters:
- Material construction. Good incubators are made of foam, which is associated with low thermal conductivity and moisture resistance of this material. A foam device is able to maintain the required internal temperature for 5 hours if a power outage has occurred. The body of this material is strong and durable.
We advise you to read about how to choose the right incubator for your home.
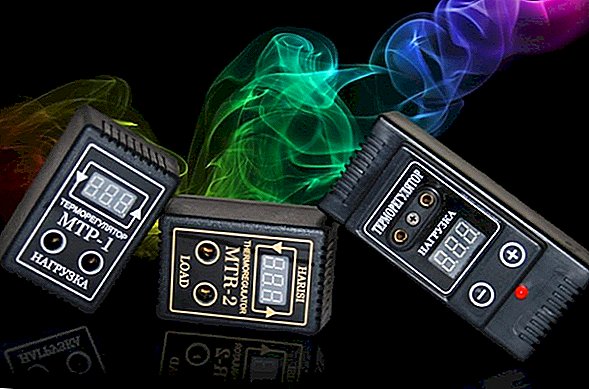
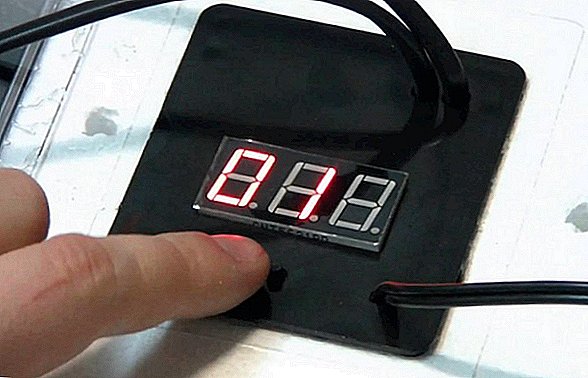
- The presence of a digital temperature controller and the ability to manually adjust the temperature. Digital thermostats allow you to observe the temperature inside the device with maximum accuracy, which greatly affects the percentage of hatchability of chicks. A mechanical thermostat cannot achieve this accuracy, which is often the reason for poor hatchability and poor quality of chicks received.
- Existence of the built-in fan and air distributor. Good ventilation of the air inside the device affects the quality of incubation, allows you to saturate the eggs with oxygen, remove carbon dioxide, and regulate the uniform temperature distribution in the chamber.
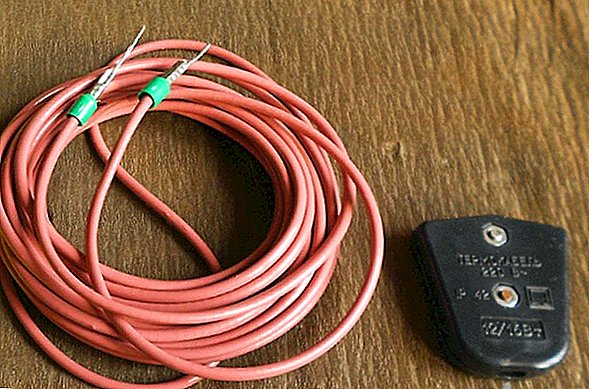
- The presence of thermal cord, which allows you to maintain the desired temperature in the device. The advantage of the thermal cord before the lamp heater is the lack of lighting in the heating process, so the eggs are constantly in a dark environment that is as close as possible to natural conditions when the eggs are located under the hen. The heat cord is a safe heater and is characterized by low electricity consumption.
- The presence in the same incubator of several ways to turn the eggs. The device can be equipped with a manual, mechanical and automatic coup. It is best to purchase a camera with a mechanical or automatic coup. A manual coup requires a lot of time on the part of a person, since it is necessary to turn the eggs no less than 2 times a day, and each unit should be lifted and turned, which takes a lot of time. In the process of a manual overturning, eggs can be damaged, microorganisms that can penetrate through the pores inside can penetrate to the shell surface, which will affect the quality of chicks and the hatchability rate. The ideal option is a camera with an automatic coup, but it has a high cost, so a mechanical coup is considered the “golden mean”.
 To start this mechanism, it is necessary to involve a person, but it does not take much effort: you just have to scroll the lever just a few times, which will turn the trays over.
 - The presence of fastening elements in trays for eggs of different sizes. This applies to devices with automatic and mechanical overturns.
Important! Be sure to pay attention to the availability of warranty and post-warranty maintenance of the incubator. Purchase a device that is guaranteed to be able to repair or replace it free of charge in case of a malfunction.
When the eggs are placed in trays, they need to be fixed in order for them not to be damaged in the course of the coup, so buy cameras that have the fixing of those eggs that you plan to place in the incubator (chicken, quail, duck, goose, and turkey).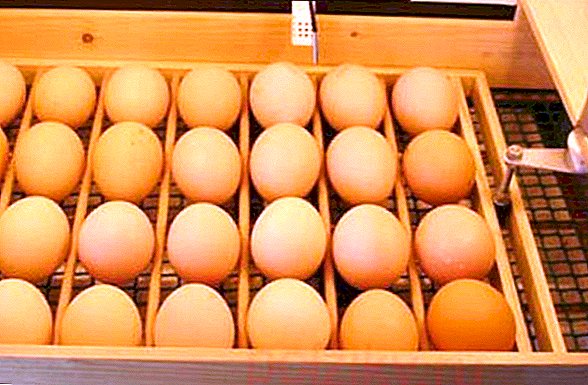


 To start this mechanism, it is necessary to involve a person, but it does not take much effort: you just have to scroll the lever just a few times, which will turn the trays over.
Incubator Overview
There are many incubators, both domestic and foreign manufacturers, which have their own characteristics, advantages and disadvantages, so consider the description of the most popular of them.
We recommend reading about how to make a psychrometer, thermostat, hygrometer and ventilation for the incubator.
"Blitz-72"
"Blitz-72" is presented in the form of a small double-layer box, which consists of a birch board and foam plastic. The inner surface contains a thin sheet of galvanized iron. A control panel with a display is mounted on the side wall, inside they install heating elements and a fan.
Inside there are also a tray and two water tanks. "Blitz-72" is equipped with an automatic turn of the eggs. 72 chicken eggs, 200 quail, 30 goose, 57 duck are placed in the chamber. The weight of the device is 9.5 kg, dimensions - 71 * 35 * 32 cm. Price - 14 thousand rubles.  The benefits of "Blitz-72" include:
- the possibility of using the device in areas with a rather low air temperature (from +12 ° C) due to the complex structure - plywood, polystyrene and galvanized iron;
- the presence of a transparent cover on top that allows you to control the process of incubation without opening the chamber;
- the presence of convenient sensors of the audible warning system, which emits a sound signal in unforeseen situations, for example, during a power outage, which allows you to quickly react;
- automatic switch to autonomous supply from batteries in the event of a power outage;
- high percentage of hatchability (at least 90%).
The disadvantages of the Blitz-72 incubator include:
- difficulty adding water to the bath due to the narrow opening;
- Difficulties with laying eggs: loading trays without removing them from the incubator is quite difficult, but it is even more difficult to put already loaded trays with eggs into the device.
It will be interesting for you to read about the advantages and disadvantages of the Blitz incubator.
"Layer-104-EGA"
This incubator is a household one, the body is made of expanded polystyrene, the top cover is equipped with a temperature and humidity control panel. The device has a system of automatic rotation of the trays, a digital temperature controller, the ability to connect to a backup power source - the battery, is also equipped with a moisture meter.  The camera is capable of placing 104 chicken and as many duck eggs, 50 goose and turkey, 143 quail on the device. The weight of the device is 5.3 kg, dimensions - 81 * 60 * 31 cm. Price - 6 thousand rubles. or 2,5 thousand UAH.
The advantages of the “Layer-104-EGA” incubator are:
- availability of price;
- small weight;
- compactness;
- the presence of an alarm signal triggered by a power outage;
- the presence of a viewing window that allows you to control the situation inside the device without opening the lid;
- the presence of special holes that provide good ventilation inside the chamber.

The disadvantages of "Laying-104-EGA" include:
- the complexity of harvesting after hatching of chicks, since various garbage gets into the pores of polystyrene;
- the appearance of plaque from dried water at the bottom of the incubator;
- large temperature variation in the chamber (1 degree), which affects the quality of hatching.
Important! Particular attention should be paid to the disinfection of the camera, due to the possibility of the development of fungus and other microorganisms inside the device.
"Mature M-33"
The device is presented in the form of a rectangular box, which is mounted on a trapezoid base and attached to it along the longitudinal axis, so that the device can be rotated clockwise at a 45 degree angle. In the chamber there are three trays for eggs and three trays for water, at the bottom there is a trash bin. 
The weight of the device is 12 kg, dimensions - 38 * 38 * 48 cm. The capacity of the incubator is: 150 chicken eggs, 500 quail, 60 goose, 120 duck. Price - 14 thousand rubles. The device has a mechanical control unit, the temperature can be changed by means of a switch. "Mature M-33" is equipped with automatic turn of trays, artificial ventilation.
The advantages of the device include:
- strong fixation of eggs in trays, which prevents mechanical damage during rotation;
- the ability to add water to the tank without opening the chamber;
- a high percentage of hatchability due to the minimum temperature variation inside the chamber;
- sufficient capacity, despite the small size of the device.

Disadvantages of "Pokedy M-33":
- the absence of a sound signal during power outages and the possibility of connecting the battery;
- frequent breakdowns of the control unit and heating elements;
- poor ventilation;
- The fragility of automatic flip trays.
"Stimulus-4000"
"Stimul-4000" is a universal farmer device that allows for incubation and hatching of chicks. The device is quite large - 1.20 * 1.54 * 1.20 m, its weight is 270 kg.
Did you know? The first simple hatcheries were specially built premises, which were built by the Egyptians more than 3 thousand years ago.
The camera allows you to display 4032 chicken, 2340 duck, 1560 goose eggs. The chamber contains trays of different types - 64 trays for chicken eggs, 26 - for duck or goose. Price - 190 thousand rubles.  The advantages of this device include:
- automatic stabilization of temperature and humidity at the set level;
- the ability to automatically rotate trays after 60 minutes;
- automatic blocking and light and sound alarm of the camera;
- the ability to control the lighting of the incubator;
- protection of current collectors against overloads and short circuits;
- the presence of a large digital control unit that allows you to adjust all indicators and fully control the microclimate in the chamber;
- the presence of a humidity sensor;
- the presence of nozzles for spraying water in the chamber;
- the ability to connect and supply water from the tank outside to the middle of the incubator;
- high-quality ventilation system;
- the presence of a chute to collect and remove fluff;
- the ability to roll the cart along with all the trays, without removing them each separately.

The disadvantages of the device include:
- inconvenient location of the control unit: it is set too high, which causes problems during the operation of the device;
- high price;
- the inability to use the camera for a continuous process of incubation, that is, it is impossible to combine incubation and hatching of chicks.
Read the description and features of the use of the Stimul-4000 incubator.
"Cinderella-98"
Incubator "Cinderella-98" is presented in the form of a rectangular chamber made of foam. The lid is equipped with wide heating elements for uniform heating of the chamber, which is equipped with auto-rotate trays, automatic regulator on and off heating elements.
Outside there is a hole where you can pour water without opening the lid of the chamber. Capacity - 98 chicken and 56 duck or goose eggs, its weight - 3.8 kg, dimensions - 55 * 88.5 * 27.5 cm. Price - 5.5 thousand rubles.  The advantages of this incubator are due to:
- low weight;
- ease of use;
- ability to connect to the battery;
- uniform temperature distribution in the chamber;
- automatic transfer to backup power in case of power failure.
The disadvantages of "Cinderella-98" include:
- failures in temperature conditions;
- the development of microbes in the pores of the foam and the formation of fungus;
- the need for frequent disinfection;
- problems with the display in the process of managing temperature and humidity.

SITITEK-96
SITITEK-96 is made in the form of a rectangular plastic construction and is equipped with an electronic control panel with a liquid crystal display for controlling humidity and temperature inside the chamber. The device has an automatic egg flipping.
Poultry farmers will be interested in reading about how to determine the sex of geese, how to choose a goose for a tribe, when geese start to rush, how many eggs a goose carries, and how long the life of domestic and wild geese is.
The incubator is powered from the network, but you can connect it to uninterruptible power supplies if power is suddenly turned off. The capacity of the device is 32 chicken or goose eggs, weight - 3.5 kg, dimensions - 50 * 25 * 40 cm. Price - 8.5 thousand rubles. or 4 thousand UAH. 
The advantages of the device include:
- automatic climate control, thanks to the built-in thermostat, hygrometer and fan;
- the presence of a built-in LED backlight located in the lower part of the camera, which allows you to evaluate the eggs "for lumen";
- economical power consumption;
- transparent cover of the case, which makes it possible to follow the eggs without opening the camera;
- the presence of an alarm that triggers in the event of a malfunction or failure of the microclimate parameters;
- the ability to add water without opening the chamber due to the hole that is located on the body.
Among the disadvantages of SITITEK-96 can be identified:
- lack of fan power to ensure good air circulation in the lower tier of trays;
- large temperature differences in tiers due to poor air circulation.

How to use the incubator
To get a good result from incubation, it is important not only to choose the right device, but also to follow all the recommendations for using it. Low cost incubators are completely manual, so you will need to independently monitor temperature, humidity and turn eggs in time.
Important! It should be remembered that each device is different in appearance, functionality and other features, so instructions are attached to any incubator to effectively establish the incubation process.
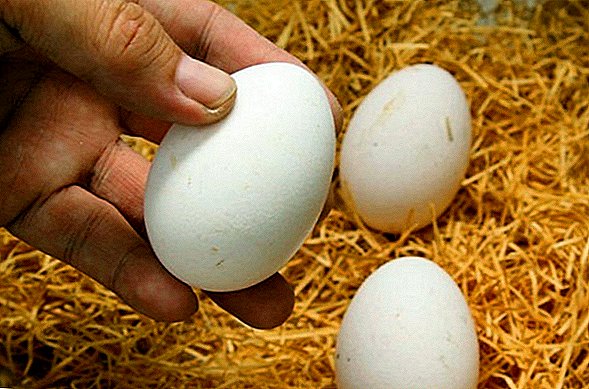
Incubators, which have a high cost, are automatic, all processes are controlled by such devices independently and human intervention is minimal. Fertilized eggs that were laid 10 days ago are suitable for incubation.  If eggs have been stored longer, their viability decreases every day. These eggs should be stored in cartons, at a temperature of +5 to +21 ° C, with each being shifted daily from one cell to another, so that the contents of the egg are in light movement.
Read more about how and how the goose eggs are stored for the incubator, how to choose the goose eggs correctly and how to ovoskopic them by day, as well as how to grow goslings in the incubator.
In order to have an idea about the use of an incubator, consider the basic generalized tips applicable to any device, regardless of manufacturer and equipment:
- After purchasing the device, it is cleaned; for this purpose, the inside of the camera is carefully vacuumed and disinfected with a bleach solution (10 drops of bleach for 0.5 l of water). Since the device was wetted during the cleaning process, the camera should be completely dried, leaving it for a day alone.
Video: Incubator Disinfection
- An already clean incubator is installed in a permanent place, in a room where the normal temperature is observed - +22 ° C. Do not place the device near windows or vents.
- You can then connect the incubator to the electricity. If the device has a compartment for the liquid, you should pour warm water into it in the amount specified in the instructions for the incubator.
- The temperature and humidity recommended by the instructions are set on the control panel; this should be done 24 hours before the eggs are placed inside the chamber. Such measures are necessary in order to make sure that the incubator is working and its ability to maintain the main indicators of the microclimate at the required level.
- After the day has passed, you should check the data on the thermometer: if the temperature coincides with that set initially, you can load the eggs. It is necessary to refrain from laying eggs, if the initially set temperature does not coincide with that which persists after 24 hours of operation of the device.
Did you know? The first incubators in European countries acquired in the XIX century, and mass production for industrial purposes was established in the USSR in 1928.
- Before laying eggs, you must thoroughly wash your hands so as not to bring to the surface dangerous microbes for the development of the embryo, which during the incubation process can penetrate into the egg and significantly reduce hatchability.
- 5 hours before the eggs are laid in the incubator, they are kept at room temperature in order to heat the contents slightly. This is necessary in order to avoid a sharp temperature drop, which is observed after moving the eggs from the refrigerator directly to the warm incubator.
- If the egg turnaround will be provided independently in the manual mode, then it is recommended to make a mark on each egg, for this purpose it is necessary to carefully put a pencil on each side of the egg with one different symbol. Thus, you will not confuse already turned copies with those that require a coup.
It will probably be useful for you to learn how to regulate the humidity in the incubator, how and what to disinfect the incubator before laying eggs, as well as what temperature should be in the incubator.
- When all the preparatory steps have been carried out, you can start laying eggs into the incubator with the blunt end upwards. If the eggs are positioned with the sharp end up, then the embryo may shift, which will adversely affect the hatching process. After the eggs are loaded into the incubator, the temperature inside the device can be much lower - this should not scare you, as it will soon return to normal very quickly if all the parameters of the microclimate were correctly set.

- It is recommended to record the date and number of eggs that were loaded into the incubator in order to approximately predict the hatching time. The average duration of elimination is 21 days.
- Every day should be at least three times to turn the eggs, if the incubator provides for a manual coup. If the coup is automatic, all you need to do is set special parameters on the device, and the incubator will automatically perform this function.
- Be sure to monitor the level of humidity in the incubator and maintain this figure at 50% throughout the incubation period. When there will be 3 days left before the output, the humidity should be increased to 65%.
Video: goose egg incubation mode
- When the time of hatching comes, you must stop turning the eggs. 3 days before this, the incubator cannot be opened. When the chicks hatch, leave them in the incubator for another 2 days.
- After the chicks have been moved to another location, the incubator should be thoroughly cleaned - vacuumed and sanitized.


How to make an incubator with your own hands
For the manufacture of high-quality incubator at home recommend the use of polystyrene foam.
We recommend reading about how to make the most automatic incubator with automatic egg turning, and also read the instructions for turning eggs in an incubator.
The manufacturing process is as follows:
- Initially, you need to purchase a sheet of polystyrene foam with dimensions of 100 * 100 cm and divide it into 4 equal parts. Such halves will be used to form the sides of the case.
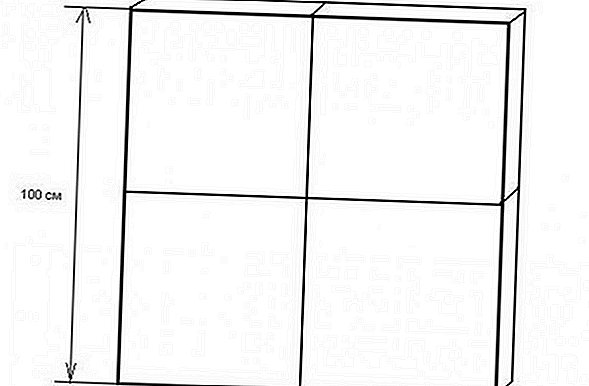
- Another sheet with dimensions of 100 * 100 cm is divided in half into two equal parts, one of these parts is divided into two more, so that its dimensions are 60 * 40 cm. The smaller sheet remaining after dividing will be used to form the bottom of the box and the larger sheet will be used as a cover.
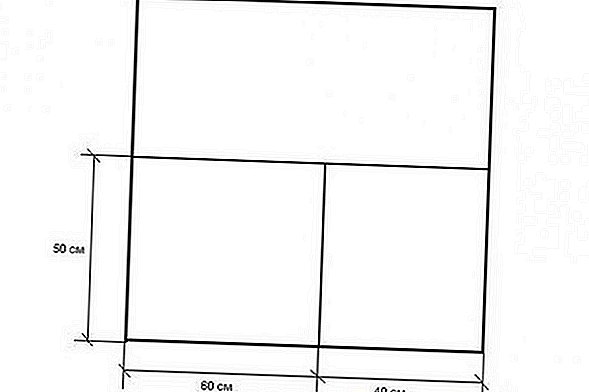
- In order to control the process of incubation, a 15 делают15 cm hole is made on the lid. It is sealed with glass or transparent plastic.
- Equal parts that were obtained by cutting the first sheet of expanded polystyrene should be glued together in one frame. After the glue has stiffened, the part that was originally cut for the bottom is glued to the frame.

- When the process of forming the box is completed, multiple pasting of the resulting body with scotch tape is carried out to give the structure the necessary rigidity.
- To create an elevation above the surface, small legs are glued to the incubator, which are cut out of expanded polystyrene in the form of bars, 6 * 4 cm in size. These two bars should be glued on the reverse side of the incubator.
- On all the walls of the structure, departing 1 cm from the bottom, make three holes each, their diameter should be 1.5 cm. This is necessary to create natural ventilation.
We advise you to consider all the details of making an incubator for eggs with your own hands, and in particular from the refrigerator.
- Then the incubator should be provided with heating elements; for this purpose, cartridges for heating lamps are arbitrarily mounted on the inside of the cover. A thermostat is installed outside the lid, the sensor for it should be fixed inside the container at a height of 1 cm from the level of the eggs.
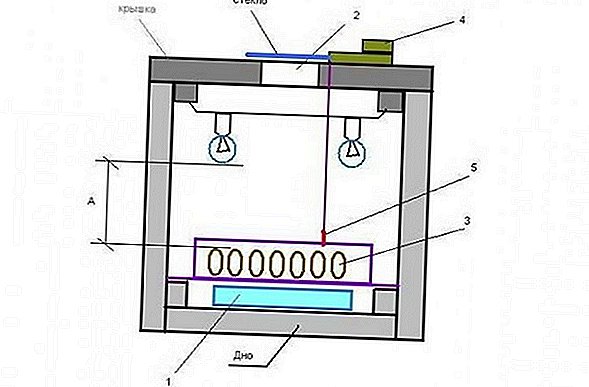 1 - water tank; 2 - viewing window; 3 - tray with eggs; 4 - thermostat; 5 - sensor When the tray with the eggs is installed, make sure that the gap between the trays and the walls is at least 5 cm - this is necessary for normal ventilation.


 1 - water tank; 2 - viewing window; 3 - tray with eggs; 4 - thermostat; 5 - sensor When the tray with the eggs is installed, make sure that the gap between the trays and the walls is at least 5 cm - this is necessary for normal ventilation.
Important! If there are problems with power outages, inside the incubator you can glue insulating foil, which will keep the heat inside for quite a long time.Thus, there are many options for incubators that can be selected for hatching goose (and not only) eggs. Such devices differ in functionality, appearance and price, have both advantages and disadvantages.
To make a choice in favor of any device, you need to decide on the spaciousness, preferred functions and the amount you are willing to spend on its acquisition.