Greenhouses from a bar are very widespread among summer residents and gardeners now.
There is a wide selection of ready-made greenhouses on the market, which you only need to collect on your own piece of land.
However, their cost is not the smallest. Therefore, many resort to self-build greenhouses.
You can do it yourself using the available materials.
Is the tree a relic of the past?
Today's variety allows you to choose from a variety of materials for construction. And despite the presence of modern metals and plastics, many prefer wooden frames, and for good reason.
- Low cost. Compared to other materials, wooden bars are cheaper.
- Easy to work. Processing and construction of a timber frame is possible even for a person who has a weak idea of construction. In addition, the work does not require any special tools or expensive welding.
- The interchangeability of parts. Wooden frame elements can be easily replaced with new ones if necessary.
- Environmental friendliness. One of the main features of wood. Such a frame will not harm the plants and the soil during the entire period of operation.
- Ease of installation. The wooden elements of the frame are simply fastened and assembled. In addition, the frame is easily disassembled when needed.
- Ability to attach any materials on such a frame. You can install glass, polycarbonate panels or just covered with a film.
- Self-construction allows you to create a greenhouse the sizes you needand the tree is great for this purpose.
Creating a durable design
 Wood, like any other material is subject to wear, and to extend the life of the wooden frame, you need to take care of wood processing.
To begin, all the bars must be cleaned with a brush from dirt and adhering soil, then sanding with fine-grained emery paper. After that, rinse well with running water and allow to dry completely.
Now you can go to the processing of wood. When choosing materials it is necessary to give preference to paints for outdoor work.
They must be resistant to high humidity and a wide range of temperatures. Over the layer of paint is not superfluous to add a few layers of varnish.
It is recommended that you regularly inspect the surface of the frame for cracks, bubbles or abrasions. Because of these flaws, moisture will begin to soak into the tree and it will rot. This place should be cleaned with sandpaper and covered with a layer of paint.
To make the structure more resistant to stress, you can use additional supports made of wood. They should be installed in places where the structure is under the greatest load.
Training
First of all, you need to decide on the choice of place to install a greenhouse. The place must meet several requirements:
- Good light. One of the most important moments in the selection of a suitable place for a greenhouse. The greenhouse should be well lit, without it the very meaning of such a structure is lost.
- Wind conditions. The greenhouse should be well protected from the wind. A good option to cover the greenhouse from the wind will be strips of evergreen shrubs. It is recommended to warm the side of the greenhouse, which is most exposed to wind.
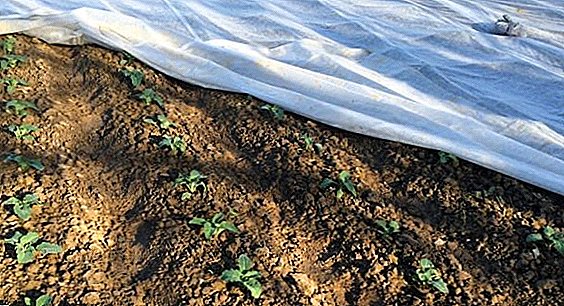
- Lack of closely spaced groundwater. Water should lie at a depth of more than 1.5-2 meters, otherwise there is a risk of rotting of the root system of plants. If the groundwater lies higher, then a drainage system will be needed and a trench should be dug along the bases of the greenhouse.
- Location on the site. To ensure maximum sun exposure, the greenhouse is best placed in the direction from North to South or from East to West.
IMPORTANT! For mid-latitudes, the location of the greenhouses in the direction of the luminary is most optimal. For more southern latitudes, it is advisable to place structures in the direction of the poles.
 After selecting the area of terrain should go to the type of greenhouse.
Depending on how the greenhouse will be used (throughout the year or only a certain period), stationary and collapsible greenhouses are separated from wooden bars.
The first are established thorough and no longer understand or transferred. The latter can be dealt with during the period when they are not used and can be transferred to another place.
After that, you can begin to create a drawing of the heifer and determine its size. The area of future construction depends on the size of the site, the type of crops that are supposed to grow and the budget, because the size of the greenhouse depends on the amount of materials spent on the construction.
The optimum area of the greenhouse will be a plot of 3x6 meters or in the region of this value. This option is quite compact, and at the same time, will be able to provide a family of several people with a harvest.
Regarding the form, the most common option is a design with straight walls and a double slope roof. Such a solution is quite simple to install and very effective at the same time.
The next stage is the foundation. The cheapest and easiest way is a base from a wooden bar. It is easy to install, and it will also be possible to move the structure to another place in the future.
IMPORTANT! Despite the advantages, the base of the timber has a significant drawback - a small service life and the need for regular change of elements.
 Another option would be a strip foundation of blocks or concrete. A base is created along the perimeter of the structure, which cannot be moved later.
There are also monolithic foundations, which are one continuous slab of concrete.
This foundation is much more complicated and expensive, but it is very durable.
After everything has been worked out and planned, you can proceed directly to the construction of the greenhouse.
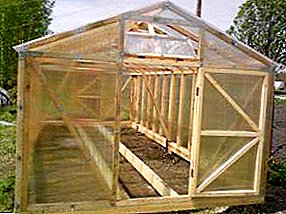
Greenhouse do it yourself from wood and polycarbonate
The construction of a greenhouse made of wood with your hands coated with polycarbonate includes several steps:
1. Foundation. Making a markup for future construction, you can proceed to the installation of the foundation. For a stable soil strip foundation is quite suitable. A trench 20-30 cm deep breaks along the perimeter, then a layer of sand and crushed stone 5-10 cm thick is poured into it. Having filled the foundation with concrete, several rows of bricks are settled on top.

2. Lower frame installation. For this purpose, a wooden base of a timber with a cross section of 10x10 cm is installed along the perimeter of the structure. Elements in half-wood are fastened.

3. Frame Now, on a wooden base, you can mount side racks and timber in the corners with a cross section of 10x10 cm. To increase strength from the inside, trim the boards. The harness is fastened with steel tape and screws. A 5x5 cm timber is installed in the upper part.

4. Roof. The best option is a gable roof. To create it, a 5x5 cm thick timber will be suitable. First, the upper timber is installed, on which the roof ridge will be mounted. Next you need to put additional rails with an interval of 2 meters.

5. Final stage - installation of polycarbonate sheets. Sheets are secured using an H-shaped profile. From the end of the sheets is set U-shaped profile. Sheets are installed vertically, so that moisture can flow over them.

IMPORTANT! It is impossible to fix sheets rigidly, since polycarbonate expands under the action of heat and can cause cracking.
To install you need to use screws with special seals. They do not allow moisture to enter through the openings. The holes themselves need to do a little more than the diameter of the screws. Between the polycarbonate and the frame set the tape for sealing.
Visually look at the greenhouse made of wood with your hands coated with polycarbonate, you can in this video:
Thus, the creation of your own greenhouse made of wood for polycarbonate is done by everyone with your own hands. Any summer resident or gardener will be able with the help of available materials to collect a good and high-quality greenhouse, which will last for many years.